Introduction[]
Hi, I'm lighthouse64, and this tutorial is all about modifying sprite sheets in pixel dungeon. I will be using paint.net for pixel art and eclipse for the source code in this article, although any pixel art or source editor will work fine.
Prerequisites[]
Here are the list of skills and programs you will need to mod Pixel Dungeon Sprites:
- Learn how to do pixel art (you can find tutorials online)
- Find a pixel art editor
- Have the source code of Pixel Dungeon (It will help you understand the sprite, and it has the assets)
- You should've set up Pixel dungeon to be ready for building
- See also: Development: Modding With Eclipse
Choosing your Sprite Image[]
To find an image to mod, go to the assets folder within the source code folder.
After that, choose any pixel dungeon NPC sprite you want to edit (creatures like rats, gnolls, crabs).
I will be using the rat sprite for simplicity.
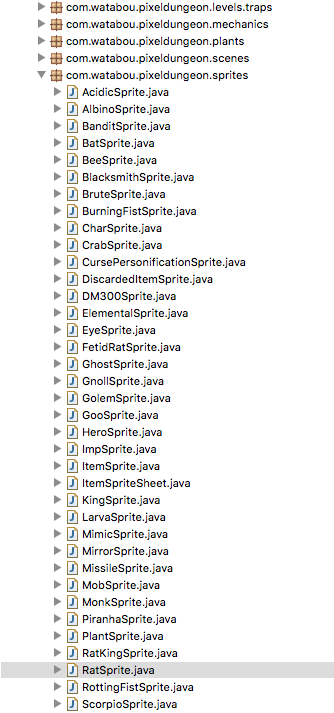
Finding the Sprite Information[]
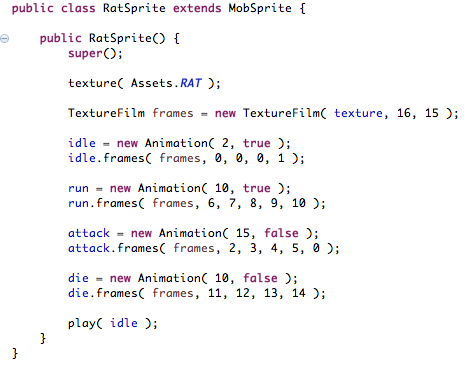
Before you want to begin, you want to know how the frames work for your sprite. (Unless you're confident you can figure out all of the information by looking at the sprite sheet.) This is where the source code comes in handy. To find the sprite configurations, go to com.watabou.yourproject.sprites. Pretty much just look for the sprites package in your project. Once you have reached that area, find the NPC you are working with and open the file that corresponds to its name.
If you want to create your own sprite, then simply try copying and pasting an original sprite, and modify that.
Here are a few things that will give you information on the sprite:
- The texture(); function determines which sprite sheet the NPC will use in the game.
- The TextureFilm(); determine's the size of each frame in an ordered pair (width (x), height (y)).
- The idle, run, attack, and die sections all show you which frames will be used within each animation, and how long each frame will play out. (More of the same frame showed = played for a longer time.)
- The play(); function is the animation you will see the NPC doing by default.
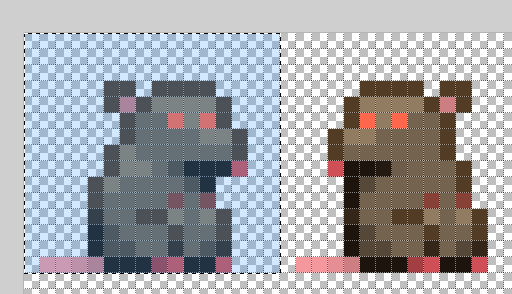
Pixel art[]
The selection size is 16x15 pixels (width x height)
Once you've opened up the image and looked at the sprite information, it's time to begin modifying the graphics.
Here are some things to remember when editing the frames.
- Check the pixels you have to work with by using the select tool over a frame.
- Try singling out the first frame you're modifying by copying it into a new image. This helps you focus on the one sprite you're working with, but once you've finished the first frame, it's easy to make animations off of it.
- Make your sprite smaller than the actual boundaries, if possible. If you have 16x15 space per each frame, I would suggest making a 13x13 creature so that it has space to move within the frame for animations.
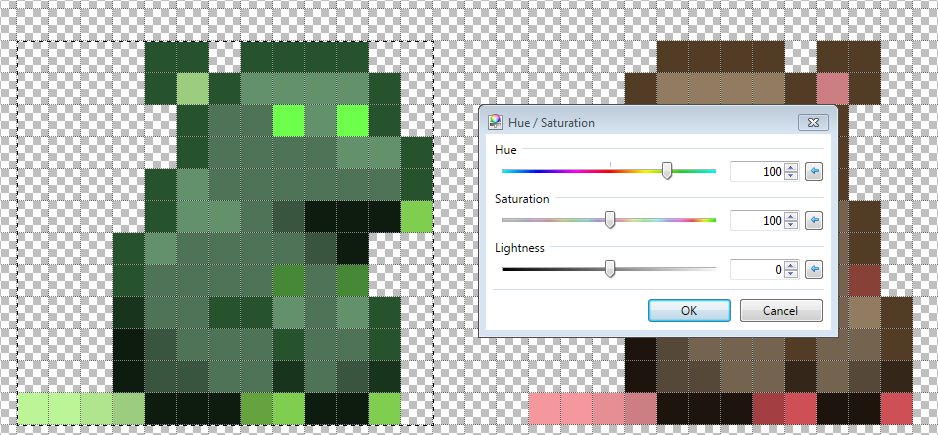
Helpful tools - Paint.net
Here are some helpful tools on Paint.net that can help you with spriting.
- Turning on the grid is helpful for viewing each pixel individually.
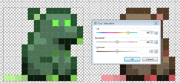
Editing the saturation
- The Hue/Saturation tool: It can be used for quick recolors on your sprite (useful for mobs that have mutation forms). It can be accessed by going to Adjustments → Hue/Saturation. (Make sure you select over the sprites you want to recolor, or everything will be recolored!)
- Be sure to try out all of the tools that paint.net has. Some of them may be interesting to you.
Compiling the sprite into your game[]
Once you've finally completed the task of modifying your sprite, simply compile your apk, and the results will appear.
Congratulations on making a Pixel Dungeon Sprite! :) I hope this tutorial helped you.
Help[]
If you need any help with spriting, you can either post a comment here, or ask a question on the forums.